Augmented Reality Timelapse Artwork with Artivive

About this lesson
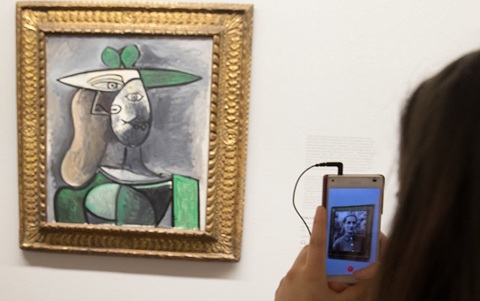
In this project, students build their own augmented reality (AR) artwork using free digital tools with Artivive. Students can augment an existing artwork or design their own. This new technology allows artists to create new dimensions of art by linking classical with digital art.
Year band: 5-6, 7-8, 9-10
Curriculum Links AssessmentCurriculum Links
Links with Design Technologies curriculum area
| Year | Strand | Content Description |
|---|---|---|
| 5-6 | Design and Technology |
Develop project plans that include consideration of resources to individually and collaboratively make designed solutions |
| 7-8 | Design and Technology |
Develop project plans to individually and collaboratively manage time, cost and production of designed solutions (AC9TDE8P05) |
| 9-10 | Design and Technology |
Develop project plans for intended purposes and audiences to individually and collaboratively manage projects, taking into consideration time, cost, risk, processes and production of designed solutions (AC9TDE10P05) |
Links with Visual Arts curriculum area
| Year | Strand | Content Description |
|---|---|---|
| 5-6 | Knowledge and Understanding |
Develop and apply techniques and processes when making their artworks (ACAVAM115) Plan the display of artworks to enhance their meaning for an audience (ACAVAM116) |
| 7-8 | Processes and Production Skills |
Develop planning skills for art-making by exploring techniques and processes used by different artists (ACTDEP039) |
| 9-10 | Processes and Production Skills |
Plan and design artworks that represent artistic intention (ACAVAM128) |
Assessment
For this activity, an oral presentation with live demonstration would provide an excellent chance for students to present their artwork to peers or the school community. In their presentation, ask students to address specifics such as their:
- Artwork title
- Artwork motivation/concept
- Description of art materials used
- Process of art techniques used
- Process of the technical design and development
- The resulting digital experience for the audience
- Any identified challenges and how they were resolved
Students can be provided with feedback from peers and the teacher. As well as a self-evaluation. Students should address, not only the art development but also the technical design and development.
| Checklist | Yes/No/Partially | Comments |
|---|---|---|
| Students describe applied techniques and processes when making their artworks. | ||
| Students demonstrate project planning processes (in the form of sketches and documents) for the design and development of their artwork. | ||
| Students explain how the design of their artwork, particularly with the use of AR, enhances meaning for an audience. | ||
| Students explain their intention behind the motivation of their artwork and use of materials to support their intention. |
For further advice, examples and support around assessment please visit the Digital Technologies Hub's assessment section.
Learning sequence
Download LessonRequired resources
The following resources are required:
- Tablet or smartphone device with Artivive App installed (available on Android or iOS) - this is the visualisation tool.
- An Artivive education account (select ‘students and educators’) that allows access to the creational tool called Bridge – this is where you can create the digital layer.
- Access to a computer or laptop to log in and use Bridge (via Artivive website).
- Access to a camera (on a smartphone, tablet or digital camera) to take stop motion photos.
- DaVinci Resolve 16 or some other video editing software (e.g. iMovie, Camtasia).
- Instructional video by Viennese artist Litto: https://youtu.be/t_pwfmmJqiI
- [Optional] If you would like to run this as an artwork exhibition, Artivive has made available templates (wall labels, marketing, etc) here: https://artivive.com/templates
Suggested steps
The following are suggested steps for implementing the lesson.
- (Optional) You might like to start with a whole-class video demonstrating what Artivive is and the possibilities. We recommend this AR poster video (music only) or this Artivive introduction video.
-
Provide students with the opportunity to view Artivive AR Artwork to demonstrate what is possible. You might like to search online for other artists using Artivive!
-
Set students with a brief/theme for their artwork project or allow them to come up with their own. You might like to set some boundaries for their artwork (such as the use of paint, print or some theme to align with a unit of work in your school).
-
View or walk students through the steps of creating a stop-motion enhanced artwork with Artivive. Follow the tutorial here.
-
Students start by planning and designing their artwork. Students design what their “end artwork” piece will be (e.g. to have a collage). They plan their artwork by decomposing the steps of their intended artwork into a series of “image sketch” stages using pencil and paper.
-
Students present their proposed artwork timeline sketch, with supporting documentation that describes the conceptual motivation behind the artwork.
-
Once students are happy with their design, they begin implementing it (either by drawing, painting, printing or capturing objects). This may take some time in order to revise and alter their initial designs as needed. Students take photos of every stage of the process they want to capture to make their stop motion video.
-
Students upload their images to a computer, taking note to name their image files in sequential order (e.g. cser_image01, cser_image02, cser_image03). They import their images into a video editing package to create one seamless video with their combined images in order. Students can overlay audio or music if they would like to accompany their video. Students save their video file.
-
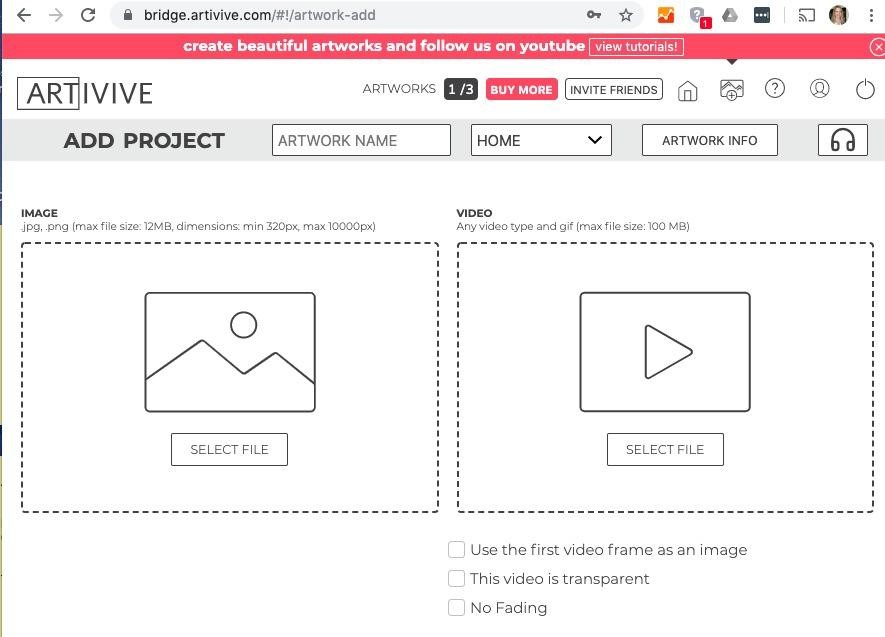
Students then upload their video file to the Artivive platform on the video side (right-hand side in image below)). They can either select the first image from the video file or upload a separate artwork image that they would like viewers to first encounter without the digital app (using the left-hand side below). This image should be the artwork that the student would like to showcase.

-
Students enter their artwork details (e.g. a name for their artwork, description, their name etc), save and download their file to either print or share digitally.

-
Students share their artwork with peers and or a wider community, along with their artwork description that provides background motivation to the piece as well as information on how it was created and materials used
Discussion
The following are suggested discussion points to unpack the Digital Technologies concepts and ideas.
- What does the digital layer with AR provide that provides viewers with a different experience to a 2D image?
- What do you think is better: 2D, Augmented Reality or Virtual Reality artwork and why?
- How does Augmented Reality change the experience for a person viewing artwork?
- How does Augmented Reality change what an artist can communicate to people viewing artwork?
- What are some challenges of using Augmented Reality for artwork?
- How might this app be used to change other fields and industries?
Why is this relevant?
This learning activity provides students with an opportunity to use Computational Thinking skills of Decomposition and Algorithmic Design to implement their desired stop-animation artwork in sequential order.
Augmented reality (AR) is an interactive experience of a real-world environment where the objects that reside in the real-world are enhanced by computer-generated perceptual information, sometimes across multiple sensory modalities, including visual and auditory. Students learn about how Artists can use AR to add digital layers to their artwork, including their design processes and considerations. Students learn about what AR is and how it is being used in modern artwork.