Hot Bots
About this lesson
This lesson was designed by Cindy Thornton, Flinders Island District High School, Tasmania.
Year band: 7-8
Curriculum Links AssessmentCurriculum Links
Links with Digital Technologies Curriculum Area
| Band | Content Description |
|---|---|
| 7–8 |
Design algorithms involving nested control structures and represent them using flowcharts and pseudocode (AC9TDI8P05). Trace algorithms to predict output for a given input and to identify errors (AC9TDI8P06). |
Assessment
Develop a similar rubric with input from your students.
| Achievement standard criteria | E | D | C | B | A |
|---|---|---|---|---|---|
| Managed a digital project | No demonstration of managing the project | Needed reminders to stay on track | Used class Gantt timeline to manage project | Adhered to class Gantt timeline to manage project | Managed project independently in school and home time |
| Defined and decomposed the problem in terms of functional requirements and restraints | No demonstration of understanding of the design challenge | Needed assistance to define and decompose the problem | Defined and decomposed problem. Completed sample projects to help understand restraints | Clearly defined and decomposed problem. Applied knowledge of function and restraints | Excellent ability to define and decompose problem in terms of functional requirements and restraints |
| Designing: Design user experiences |
Unfinished/ unclear, unworkable design | Design communicates intentions; shows some necessary components; some consideration of end user | Design clearly communicates intentions; shows necessary components; demonstrates function. Consideration given to end user | Design clearly and accurately communicates intentions; is annotated and detailed; shows necessary components; demonstrates function. Focus on needs of end-user | Design is unique and innovative; clearly and accurately communicates intentions; is detailed; shows necessary components; meets needs of variety of end-users |
| Design user experiences: Assembling hardware |
Construction is incomplete and/or inaccurate. No understanding demonstrated | Components are assembled following instructions with teacher assistance. Limited under-standing of how components work in the circuit | Components are assembled safely and correctly, following the diagrams, with assistance as required. Demonstration of basic understanding of circuits | Components are assembled safely and correctly with understanding of polarity and circuits. Some assistance may be given | Components are assembled independently, safely and correctly demonstrating understanding of electronics. Hardware allows for automation of heat pump |
| Program-ming: Design algorithms incorporating branching and iterations |
Programming is incomplete, little effort was applied | Program is copied from sample code with little understanding | Program works and allows for data collection and presentation, includes branching and iterations. Basic understanding of code | Program is efficient and annotated allows for data collection and presentation, includes branching and iterations. Good understanding of code | Programming is elegant and efficient. Excellent understanding. Programming allows for automation of heat pump |
| Modifying: Test & modify digital solutions |
Solution untested | Solution tested, no consideration given to modifications | Solution tested and modified where required | Solution tested. Various modifications implemented | Solution tested in different conditions. Modifications made to optimise performance and aesthetics |
Learning intentions
- Students will design an autonomous Arduino microcontroller containing a temperature sensor and alert signal.
- Students will construct an autonomous Arduino microcontroller containing a temperature sensor and alert signal.
- Students will program the robot to collect and present data on ambient classroom temperature.
- Students will program the robot to give an alert when the temperature reaches 25C.
Learning hook
-
What are automated systems and how might they work?
A sensor light is an automated system. How might that work? Consider how a computer program is used to automate the system. What data does the system require? How would it use this data in a computer program?
- Discuss advantages of automation and provide examples of other automated systems or ask students to describe systems they know about.
Learning map and outcomes
In this series of tasks, students will use and develop some important programming skills that relate to controlling an automated system.
For students who have only just started learning to program with general purpose programming and are unfamiliar with programming Arduinos, consider adapting the PRIMM approach to programming (Sentance, 2017) for this project.
Learning input
Introduction to Arduino
- Provide a basic code, for example, Blinking LED (Figure 1) for students to view on a whiteboard or similar and predict what it might do. As a class ‘read’ the code together. Talk about the syntax, for example, digital Write writes a HIGH or a LOW value to a digital pin. Talk about delay (1000), which is measured in milliseconds, so 1000 ms is equivalent to 1 second.
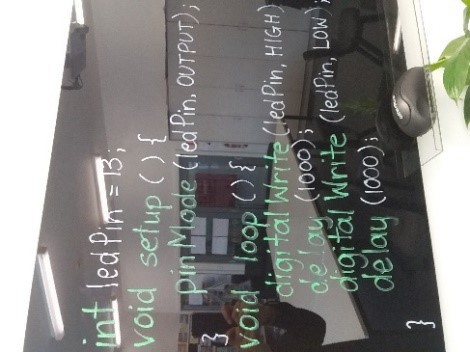
Figure 1: LED code. Image credit: Flinders Island District High School.
- It may help to revise the concept of a circuit and discuss the use of resistors. Provide the Arduino hardware to construct the circuit associated with the program, for example, an LED circuit (Figure 2a, 2b).
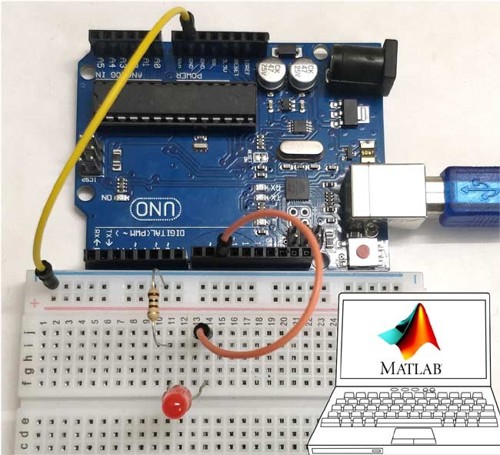
Figure 2a: Hardware for LED circuit
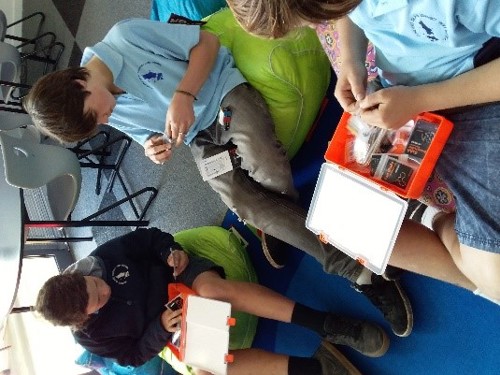
Figure 2b: Constructing the circuit
- Provide students with access to the Arduino integrated development environment. Students investigate and run the program from the built-in examples in Arduino, referred to as sketches. Once the code and outputs are working, ask students to read the code and annotate it (Figure 3), commenting on what each line of code does. Students can then modify the code to change inputs or outputs or other functionality.
Figure 3: Student comments on code show understanding of the program
Teacher reflection
Originally it was planned to present the design challenge to the students in the first lesson, but then it was decided that students needed an idea of what Arduino is, and can do, so they could keep that in mind when brainstorming ideas. Considering materials is part of the investigating and defining phase of the design process (Albion Campbell & Jobling, 2018). Using the PRIM part of PRIMM (Sentance, 2017) was successful, and definitely an approach that will be used again. Student program annotations were a relatively quick, flexible formative assessment tool that could be completed as a whole class, individually, verbally or in writing.
Learning construction
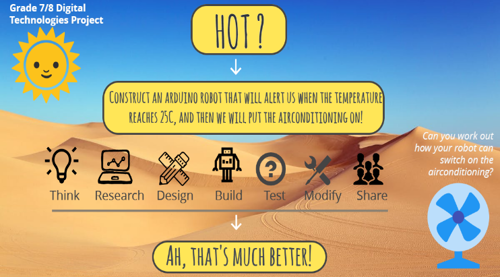
Figure 4: Hot bots technology challenge brief
Set the challenge
- Present students with the Hot bots challenge (Figure 4) and ask them to brainstorm as many ideas as possible. Sample ideas students might come up with include:
- wireless connection to the air conditioner
- wristband vibration alerts
- consideration of people with sight or hearing impairments
- screens to display the temperature and design aesthetics.
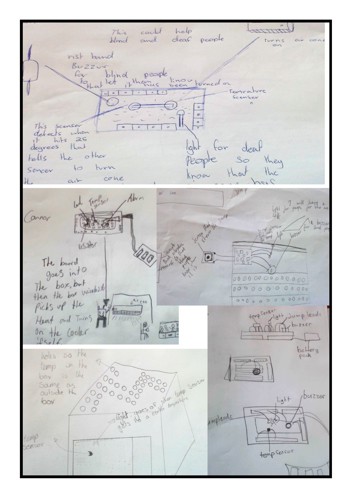
Figure 5. Student examples
Teacher reflection
Giving students five minutes to silently and individually brainstorm in a written or pictorial format, before seeing what their peers had done, ensured every student had to contribute and not leave the thinking to others. Differentiation in how they could record their thoughts, suited student preferences for writing, drawing or using diagrams.
Development of ideas and skills
-
Provide time for students to explore other activities in the Arduino kit, including buzzers and the temperature sensor to aid in the development of their skills in assembling and programming Arduino, and to assist in refining their thinking about their proposed solution.
Student learning
Sometimes if students copied and pasted code, a ‘stray 304’ error would appear and the code would not compile. Undertaking an internet search for this issue found that it was caused by hidden characters (see Figure 7) in the copied code. Using ‘Tools>Fix encoding & reload’ highlighted the characters for deletion, or typing code into the IDE, instead of copying and pasting, solved this issue. Students added to their electronics knowledge, learning about temperature sensors and how they have three pins – power, voltage output and ground – and how to identify which is which.
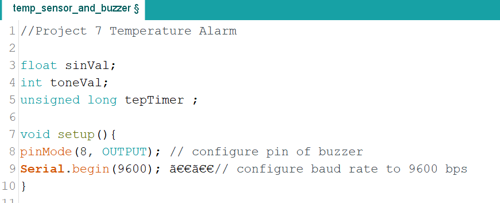
Figure 6: Stray 304 errors
Teacher reflection
Being open with students about Arduino being a new learning experience for the teacher, as well as the students, led to a collaborative learning atmosphere, with students enjoying solving problems (such as debugging sample code errors) alongside the teacher. Teacher expertise can indeed grow when they learn alongside their students! (Kelly, 2006). For example, the teacher learnt about temperature sensors and the (intense!) heat they create if connected the wrong way round and could remind the students about the importance of polarity!
Learning demo
Flowcharts and pseudocode
Discuss with students the two different ways of designing algorithms: pseudocode and flowchart.
Ask students to articulate their idea of how the Arduino would be controlled by using their choice of a flowchart or pseudocode. Compare this approach with jumping straight into programming.
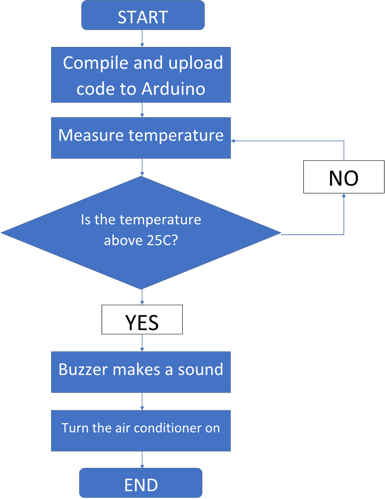
Figure 7: Flowchart
Teacher reflection
Because the Arduino was completely new to students, it was important that other tasks such as flowcharts and concepts of branching and decision-making had been previously introduced to students. This would mean the project was not overwhelming for less confident students. Giving students a choice of flowcharts, pseudocode or code suited individual abilities (and temperaments!).
Learning construction
Making and modifying
- After completing their exploration of the Arduino kit, students can start to implement their digital solution for the Hot bots design challenge. One solution could be to automate the switch on the remote of an air conditioner. This would include the need of a servo with an ‘arm’ attached. (Figure 8).
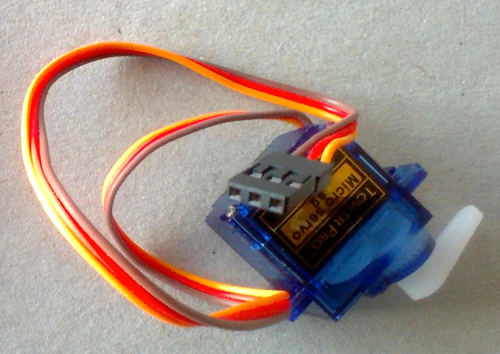
Figure 8: Servo motor with arm attached
- The challenge in this case is to program the servo and temperature sensor together. Figure 9a and 9b show an example of the hardware and programming. The Arduino displayed data in the serial monitor is displayed in Figure 10.
 Figure 9a Hot bot hardware
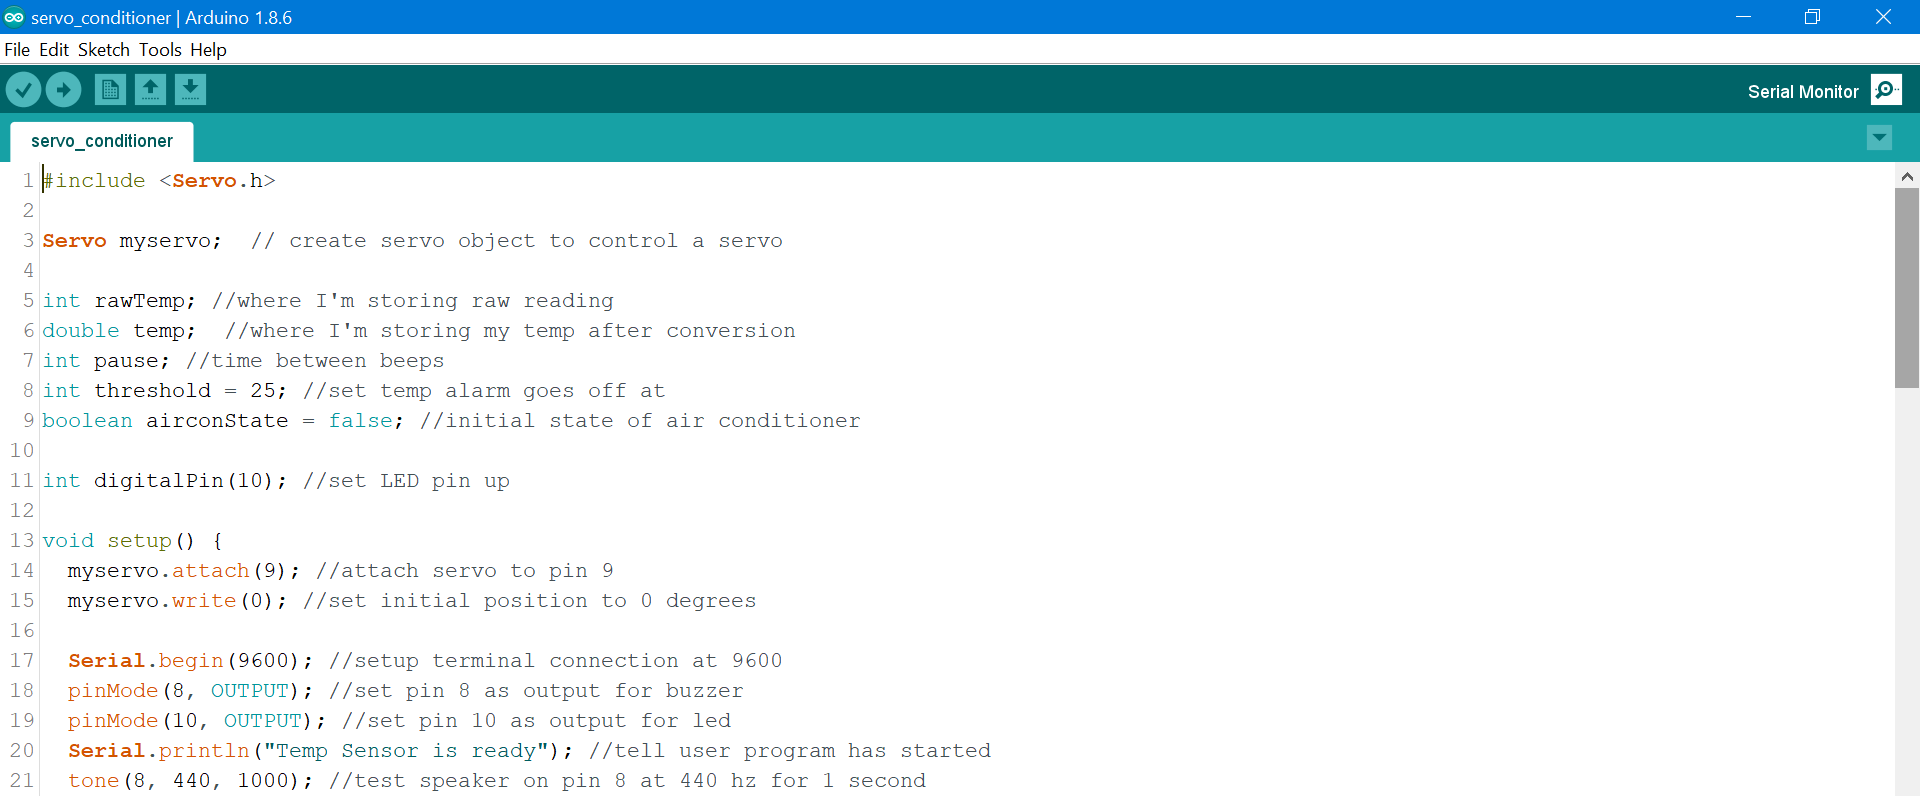
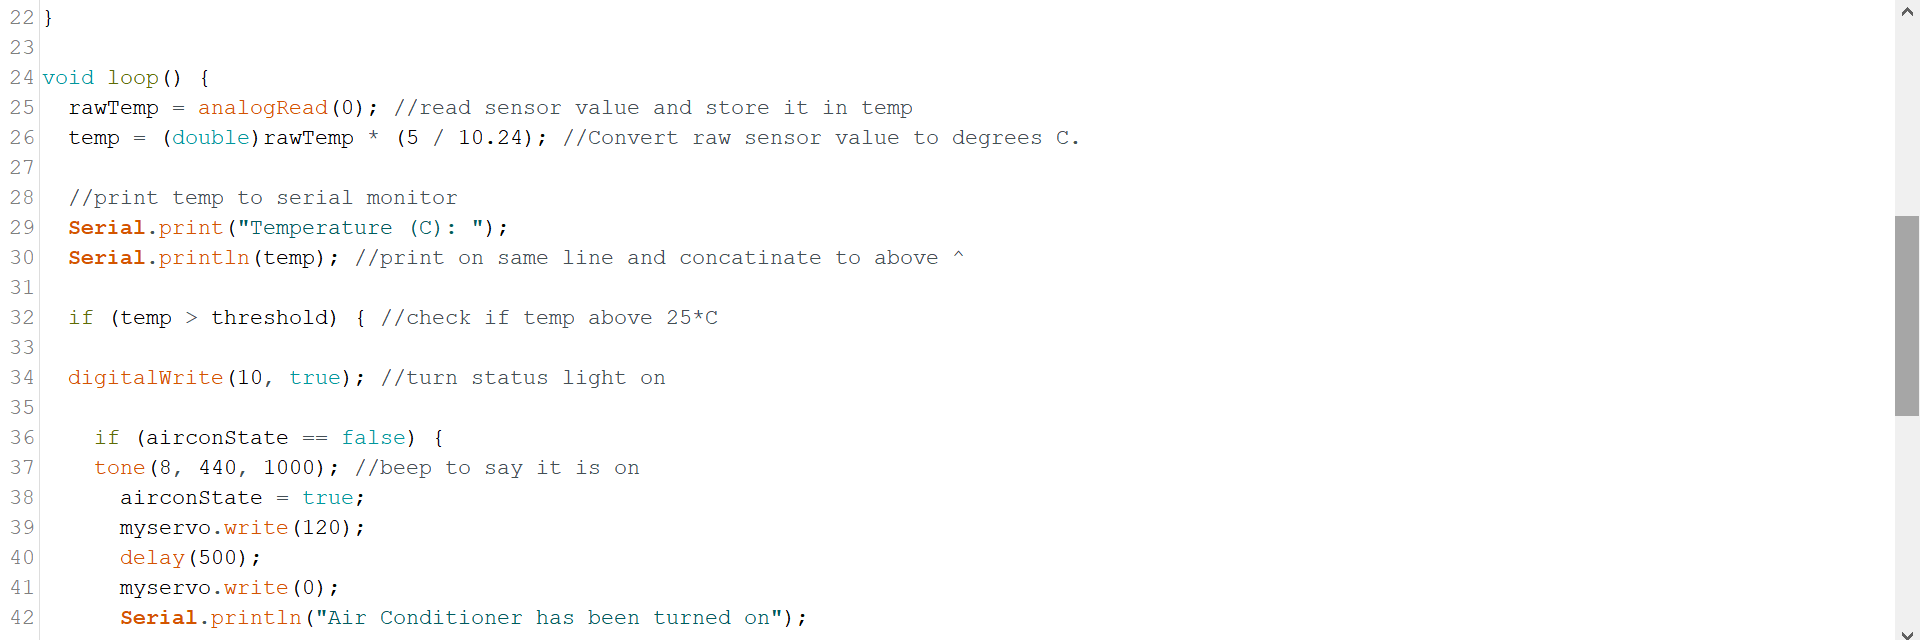
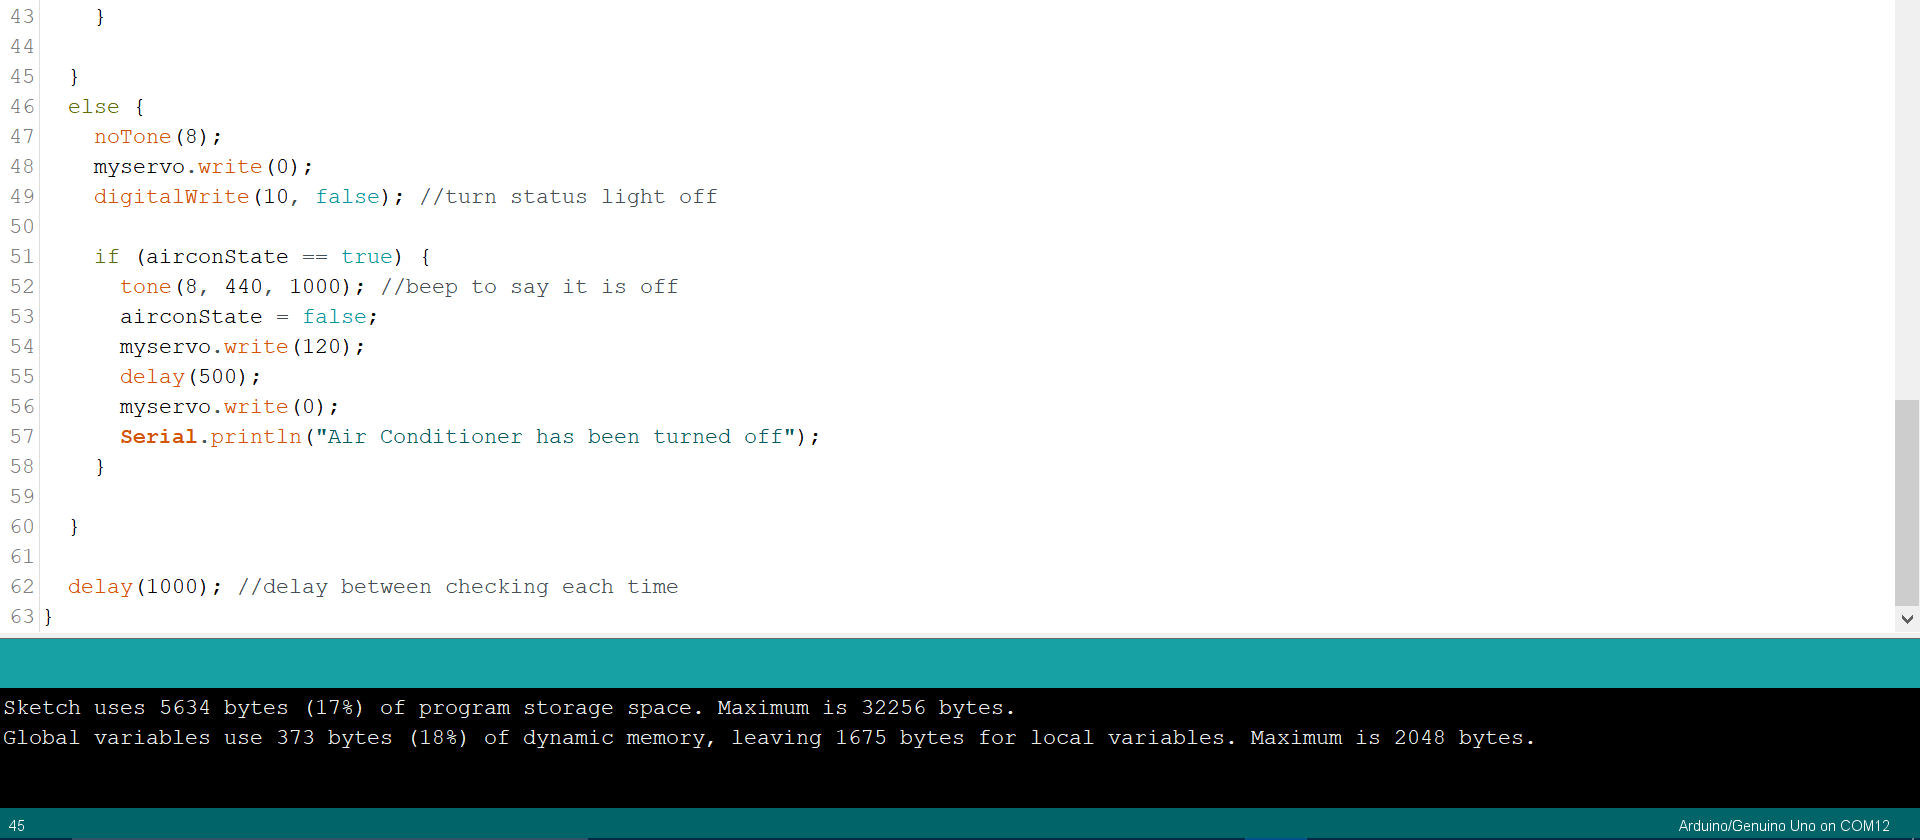
Figure 9b: Hot bot program
Student learning
Student groups worked at their own pace; some needing a lot of time on exploring preliminary projects but formative assessment through observations and discussions showed all were working toward achieving the basic learning intentions. Students received feedback on their progress that was specific, substantial but not overly detailed, as this would benefit their learning most (Albion et al, 2017).
Learning reflection
Use these prompts to guide and support student self-reflection and self-assessment.
Hot bot student reflection prompts:
- What are your thoughts on using the class Gantt chart to manage your project?
- Describe the computational thinking skills you used during this project.
- How did your project function?
- How user-friendly was your design?
- Explain the features of your code. How could you use the data generated by your Hot bot?
- How could you extend this project?
Further challenges
The temperature sensor could be used in future projects requiring measurement of ambient temperatures in different locations around the school, such as different classrooms or the garden hothouses, and be programmed to give readings at different time intervals.
Students can use the data to make predictions, publish it to the cloud, or display it on an app or with an LED light display.
Other project ideas could involve making:
- electronic thermometers
- temperature-controlled food containers that show a readout of the temperature inside the box
- temperature-controlled lights or weather stations.
Resources
- Arduino kits including breadboards: Arduino integrated development environment.